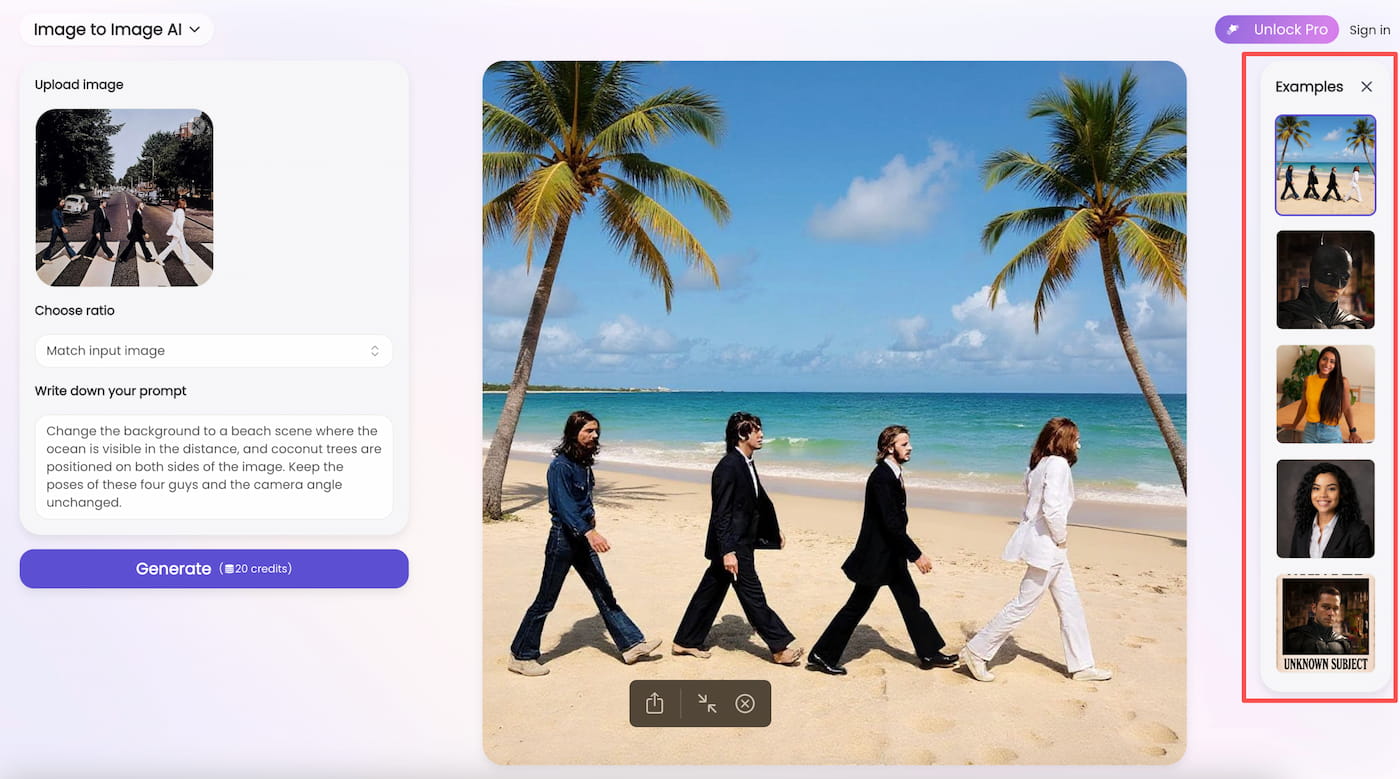
How to Use Image2Image AI
Master the art of AI image editing with our comprehensive guide, examples, and pro tips.
Create Magic in 3 Simple Steps
1. Upload Image
Drag & drop your photo into the editor. This is your canvas.
2. Write Prompt
Describe what you want to change.
Need help writing prompts?
3. AI Magic
Click Generate and watch your vision come to life in seconds.
See What’s Possible
Real examples generated by our users.
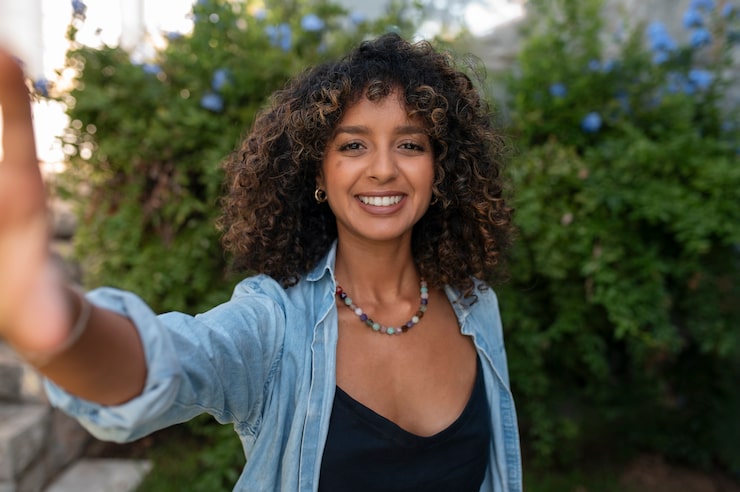
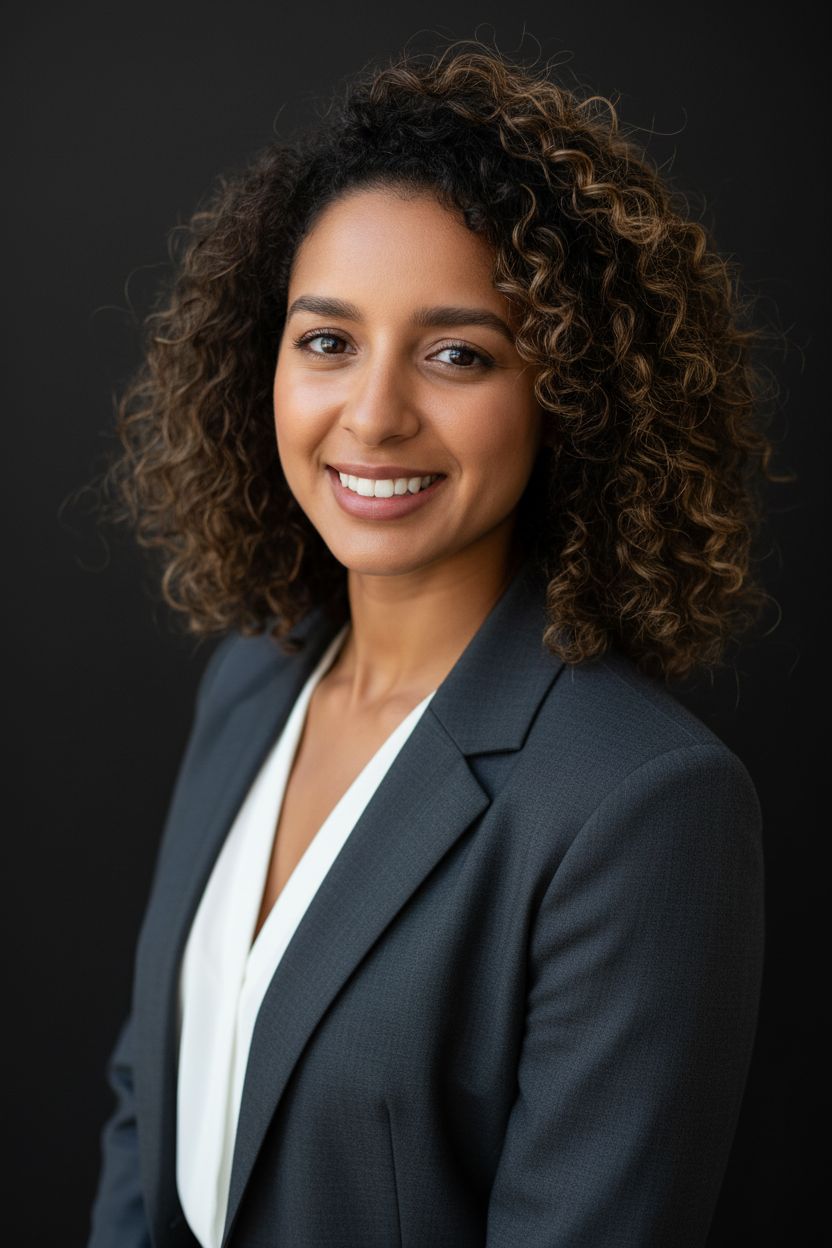
AI Headshot Generator
Transform casual selfies into professional studio-grade LinkedIn profile photos without booking a photographer.
Professional high-resolution portrait, retaining the subject's exact facial features and identity. Bust-up composition...
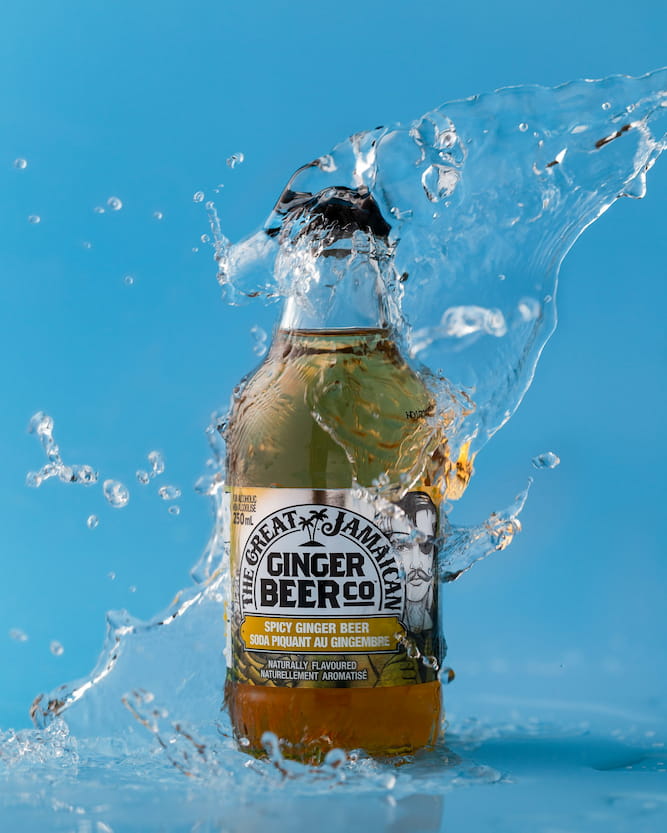
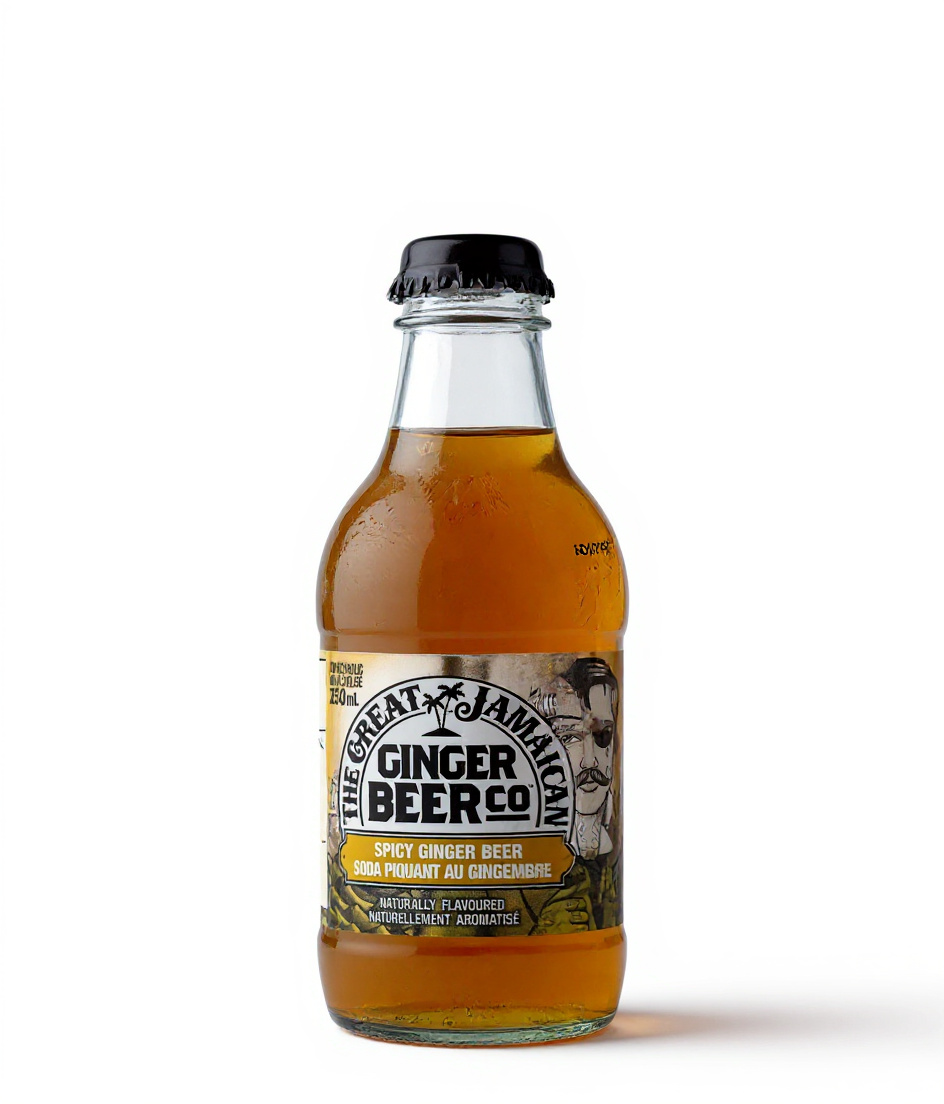
Product Photography Cleanup
Instantly remove complex splashing water backgrounds to create clean, e-commerce ready images.
Remove the background and the water. Make the background pure white.


Precision Text Editing
Change specific text elements, numbers, or prices on 3D objects while maintaining the original style perfectly.
Change the number '60%' to '34%'
Don't Know How to Prompt?
Struggling to find the right words? We've built a cheat sheet right into the editor.
Simply look to the Examples Sidebar to instantly apply professional prompts.
Mastering the Prompt: 10 Pro Tips
State the change directly
“Turn the car red” is enough for a simple color swap; be specific about material or location.
Lock specific features
Append “while keeping the original style, composition, and facial features” to prevent unwanted changes.
Break edits into steps
Don't do it all at once. Change the background first, then add objects, then adjust lighting.
Use style references
Name the exact style (e.g., 'watercolor'), artist, or movement to guide the AI's aesthetic.
Keep identity consistent
Refer to “the woman with short black hair” rather than “her”; explicitly list features that must remain.
Quote text literally
Write: Replace ‘old text’ with ‘new text’, and add “keep the same font and color”.
Prevent repositioning
Spell out “keep the subject in the exact same position and scale” so the camera angle stays locked.
Choose verbs carefully
“Change clothes to armor” modifies the object; “Transform into a knight” might replace the whole person.
Maintain the medium
Add “while maintaining the painting style” when editing art to prevent it from looking like a photo.
Iterate quickly
Use chained edits. Apply one prompt, then apply another on the result. Identity remains stable.
Launch Our Editors Directly
Jump straight into the specific tool you need for your creative workflow.

AI Photo Editor
A powerful, all-in-one suite to crop, resize, filter, and adjust your photos instantly.
AI Image Generator
Turn your text descriptions into stunning, high-quality visual art in seconds.
Object Remover
Clean up your photos by magically erasing unwanted people, clutter, or defects.
Image Upscaler
Enhance resolution and clarity, transforming low-res images into 4K masterpieces.
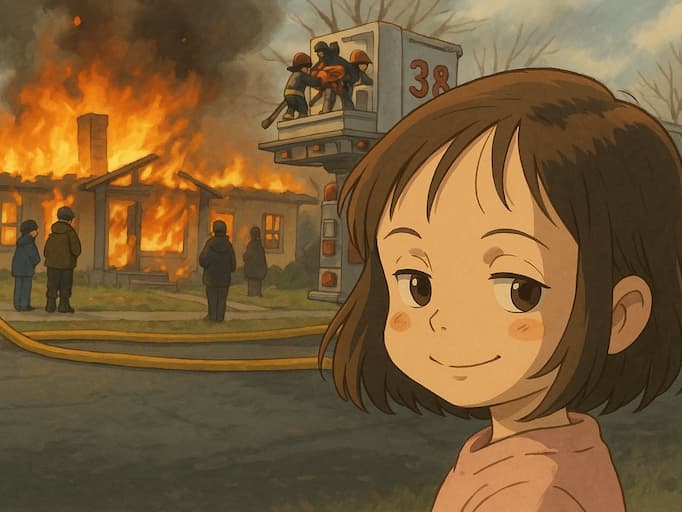
Image GPT
Edit images using natural language chat commands—just ask and receive.
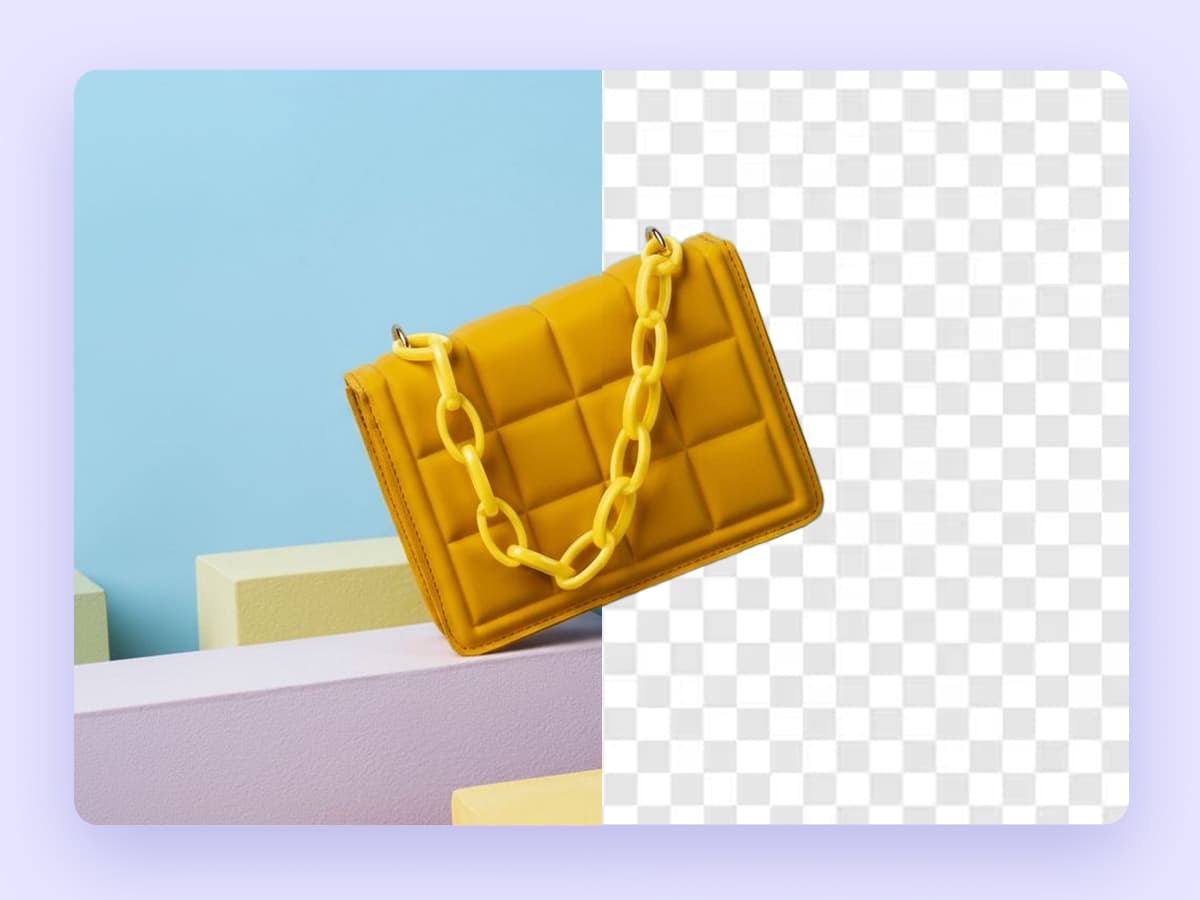
Background Remover
Instantly isolate subjects and create transparent backgrounds with one click.
Explore Our Full AI Suite
Pro Tip: Scroll down on any of these pages to find a Prompt Gallery. Learn syntax, copy prompts in one click, or hit "Create Similar" to start instantly.
Generation & Creation
Turn ideas into visual reality from scratch or references.
Precision Editing
Remove defects, text, people, or objects seamlessly.
Quality Enhancement
Fix low-res, blurry, or noisy images instantly.
Business & Professional
Create assets for corporate and branding use.
Common Questions
Why is my result blurry?
Generative AI sometimes prioritizes creativity over pixel-perfect sharpness. For crisp, 4K print-ready quality, we recommend running your result through our AI Image Upscaler.
Why does the inserted object look weird at the edges?
Try making your Red Box slightly larger to include more background. This gives the AI more room to blend the new object with the surroundings.
Can I change the whole image style?
Yes! Just don't draw any box (or select the whole image) and describe the new style in the prompt.
The result is not what I typed.
Try to simplify your prompt. Check the examples on the right sidebar (as shown above) to see how effective prompts are written.