10 Creative Ways to Transform Your Photos with Image-to-Image AI (You Won't Believe )
 By Antoli Felipe
As generative AI matures, the conversation among professional creators is shifting from the novelty of a pure AI Image Generator to the precision and control of image-to-image (I2I) synthesis. As the Lead AI Artist at image2image.ai, I've spent thousands of hours in the trenches, personally guiding the development of these tools and discovering what truly works.
I can tell you from direct experience: for creators who value their unique vision, I2I is the real frontier. It allows us to use a source image not as a mere suggestion, but as a structural scaffold, respecting its composition, depth, and form. This guide is a distillation of that experience—a field manual of ten powerful, tested techniques that move beyond simple filters into the realm of deep, structural transformation.
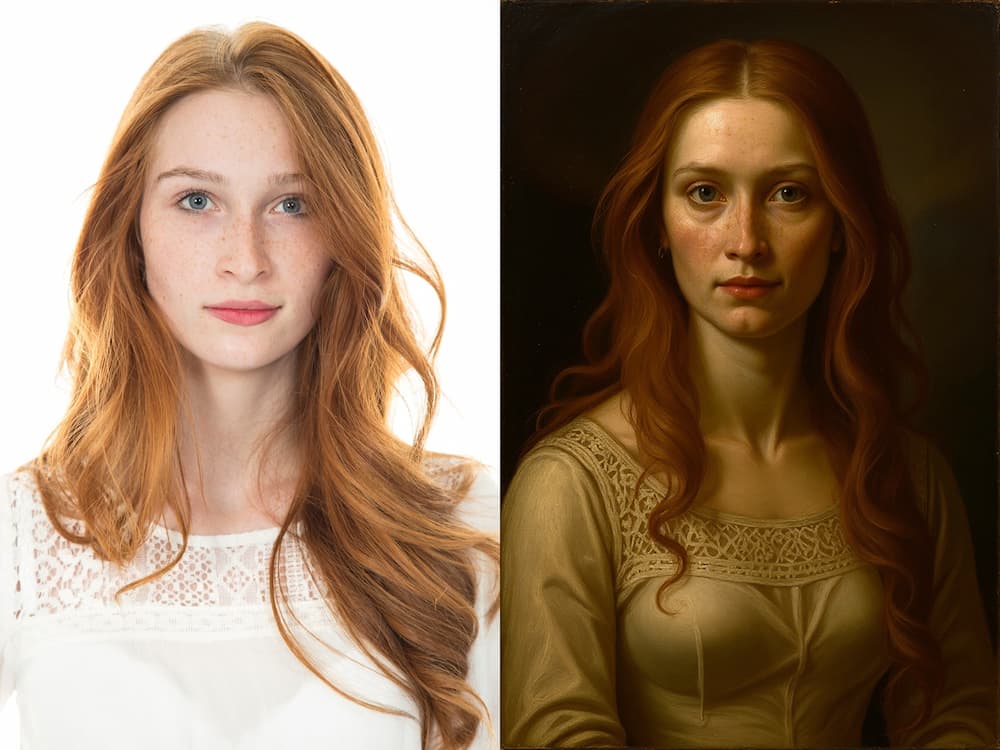
1. From Selfie to Stoic: Classical Portraiture
The Principle: The AI analyzes the geometric data (facial structure) from your photo and re-renders the textural data (skin, hair, clothing) based on your prompt's artistic style.
- Our Field Notes (Experience): This works best with clean, diffuse lighting. In my tests, harsh jawline shadows are sometimes misinterpreted as a beard. A clear headshot against a neutral background—or one generated using a free AI headshot generator—is the ideal starting point for a predictable, high-quality result.
Execution Guide:
- Source Image: A clear headshot.
- Sample Prompt:
Make this woman Rembrandt style oil portrait, with all facial features unchanged
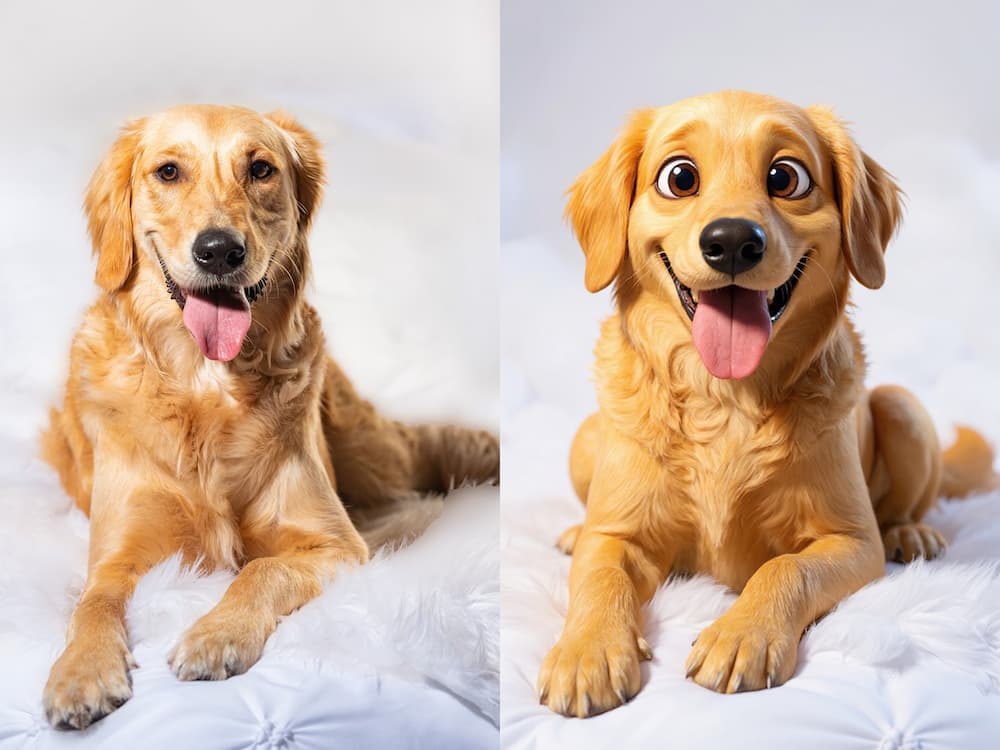
2. The Pixar Principle: Animating Your Companions
The Principle: The AI applies a well-defined animation aesthetic, simplifying real-world textures like fur and backgrounds into stylized, rendered surfaces.
- Our Field Notes (Experience): The most common failure I see is a busy background, which can cause the AI to "merge" the pet into its surroundings. For best results, use a photo where your pet's silhouette is clearly defined against a plain surface.
Execution Guide:
- Source Image: A full-body shot of your pet with a clear silhouette.
- Sample Prompt:
A golden retriever as a Pixar character.
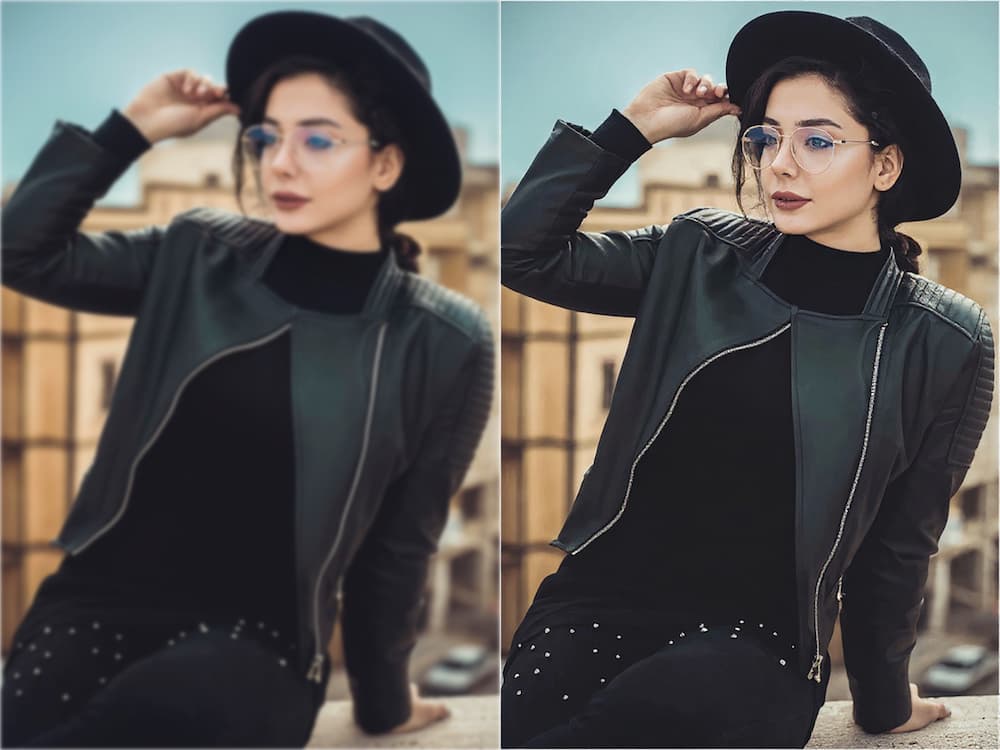
3. Crystal Clear: Restoring Blurred Photos
The Principle: Our AI Image Editor analyzes motion or focus blur, intelligently predicting the original pixels to unblur the image and restore sharpness and clarity.
- Our Field Notes (Experience): I've found this to be a lifesaver for rescuing precious photos that are just slightly out of focus or suffer from minor camera shake. It's for restoration, not magic—it works best when the core subjects are still recognizable.
Execution Guide:
- Source Image: A blurry or out-of-focus photo.
- Sample Prompt:
Unblur the photo, enhance details, and sharpen the image.
4. Blueprint to Reality: Photorealistic Rendering
The Principle: Our Image GPT interprets the clean lines in a sketch as edge data for a 3D object, then synthesizes lighting, material, and texture.
- Our Field Notes (Experience): This is a game-changer for designers. For best results, use a clean black-on-white line drawing.

Execution Guide:
- Source Image: A clean line drawing of a character or object.
- Sample Prompt:
Make this picture a Photorealistic style
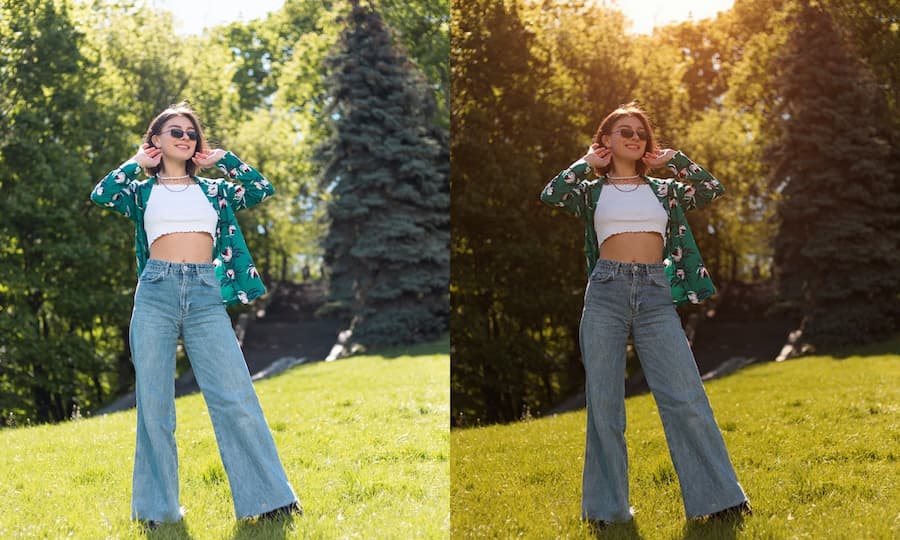
5. Mastering the Chronoscepter: Manipulating Time of Day
The Principle: The I2I model keeps an image's geometry static while completely recalculating its lighting model, a core function of our AI Photo Editor.
- Our Field Notes (Experience): This is fantastic for architectural "virtual staging" or landscape work. I often use it to see how a building's facade interacts with light at different times, which can reveal surprising details in the texture.
Execution Guide:
- Source Image: An architectural or a model photoshoot taken in flat, midday light.
- Sample Prompt:
Change the lighting to the golden hour
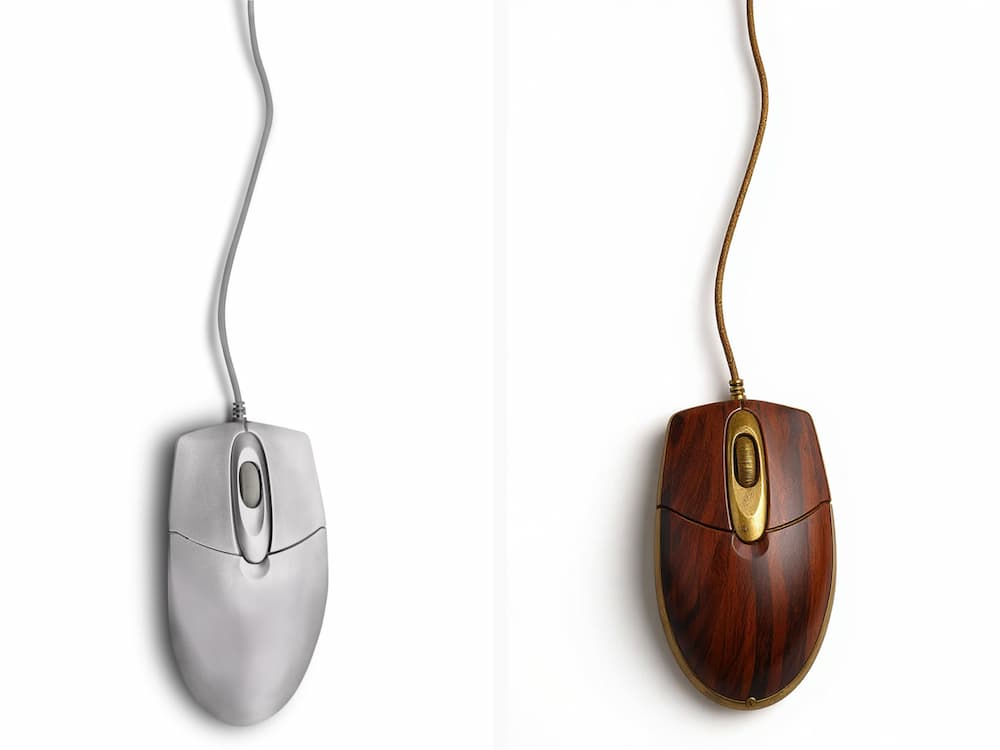
6. Surface Swap: Instant Texture and Material Change
The Principle: The AI intelligently isolates the shape and form of an object in your photo, allowing you to "reskin" it with entirely new textures and materials described in your prompt. It maintains the original object's silhouette while changing its surface properties.
- Our Field Notes (Experience): This technique is a game-changer for product visualization. I've found it works best on cleanly shot objects. For items like a mouse, a vase, or a camera, the results are stunningly realistic and save hours of 3D modeling work.
Execution Guide:
- Source Image: A clear product shot of a modern gadget.
- Sample Prompt:
Make the computer mouse made of brass and mahogany.
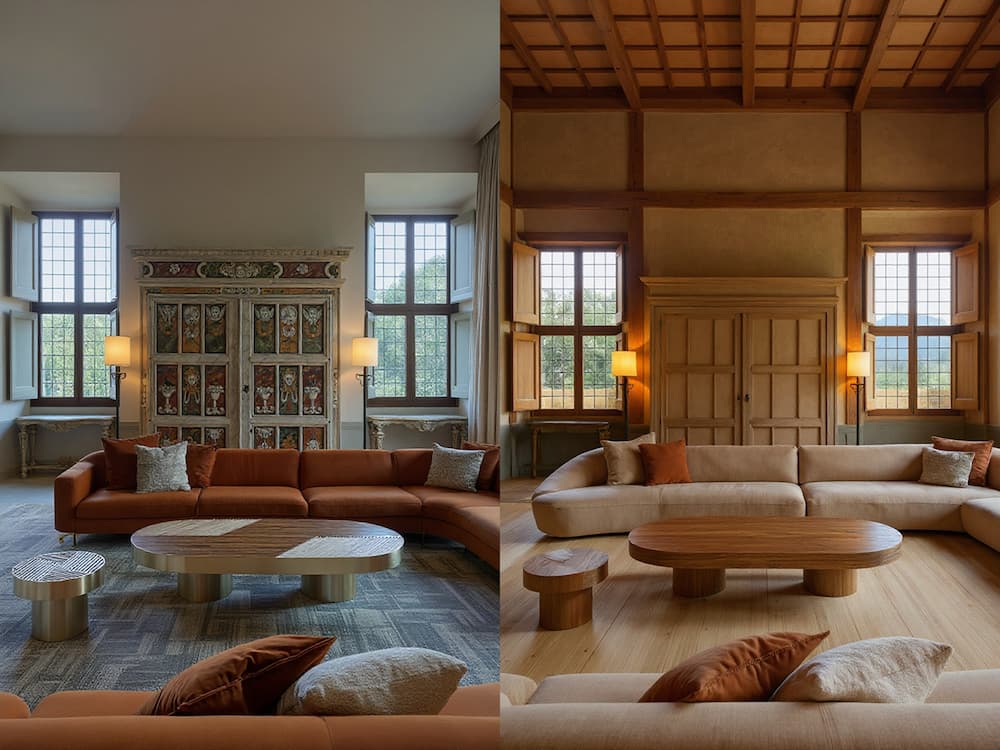
7. Architectural Iteration & Conceptual Design
The Principle: The model uses a photo's perspective and scale as a rigid foundation, allowing you to swap entire architectural styles, materials, and moods without ever opening 3D software.
- Our Field Notes (Experience): Our architect users report this cuts down their initial concepting time by hours. My advice is to iterate; your first result might be close, but the third or fourth, after tweaking the prompt, is often where the magic happens.
Execution Guide:
- Source Image: A clear photo of a building's exterior or an interior room.
- Sample Prompt (Interior):
change the interior design a Japanese minimalist style
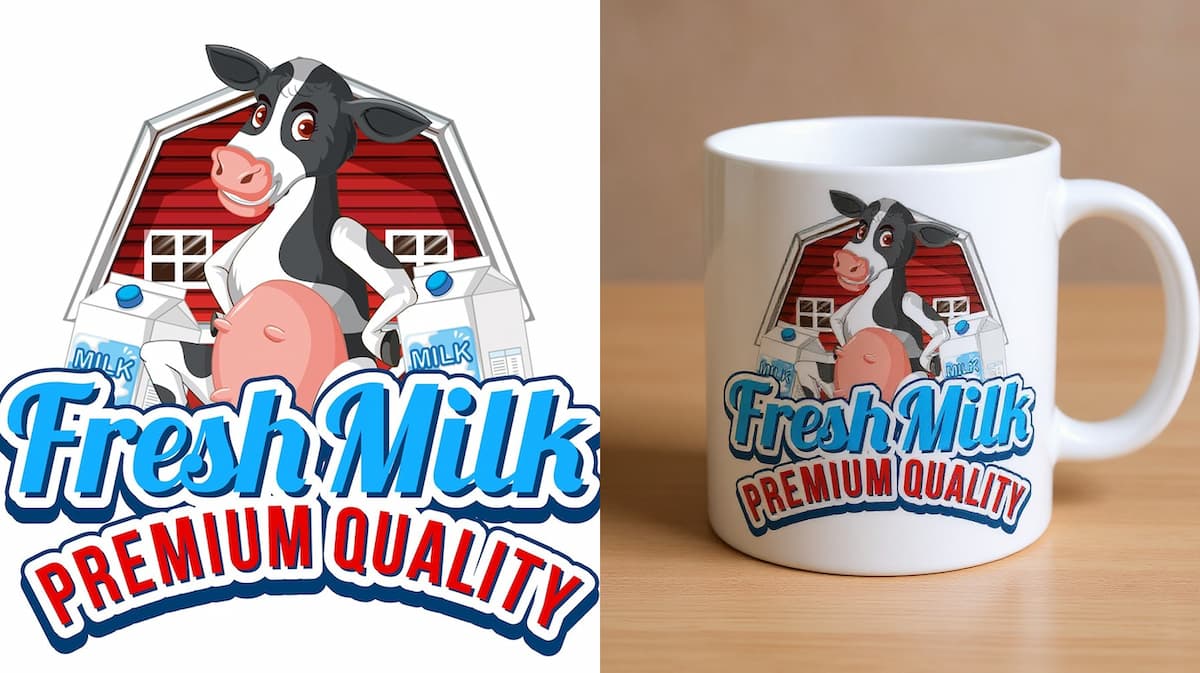
8. The On-Demand Product Mockup Engine
The Principle: Use our Free AI Image Editor to apply a 2D design onto a 3D surface in a photo, with the AI correctly handling perspective warp and lighting.
- Our Field Notes (Experience): A huge time-saver for e-commerce. I always tell users to start with a high-quality, well-lit photo of the blank product. A better source image leads to a much more believable final mockup.
Execution Guide:
- Source Image: A photo of a blank "target" object (e.g., plain t-shirt, coffee mug).
- Sample Prompt:
Put the logo on a white mug cup
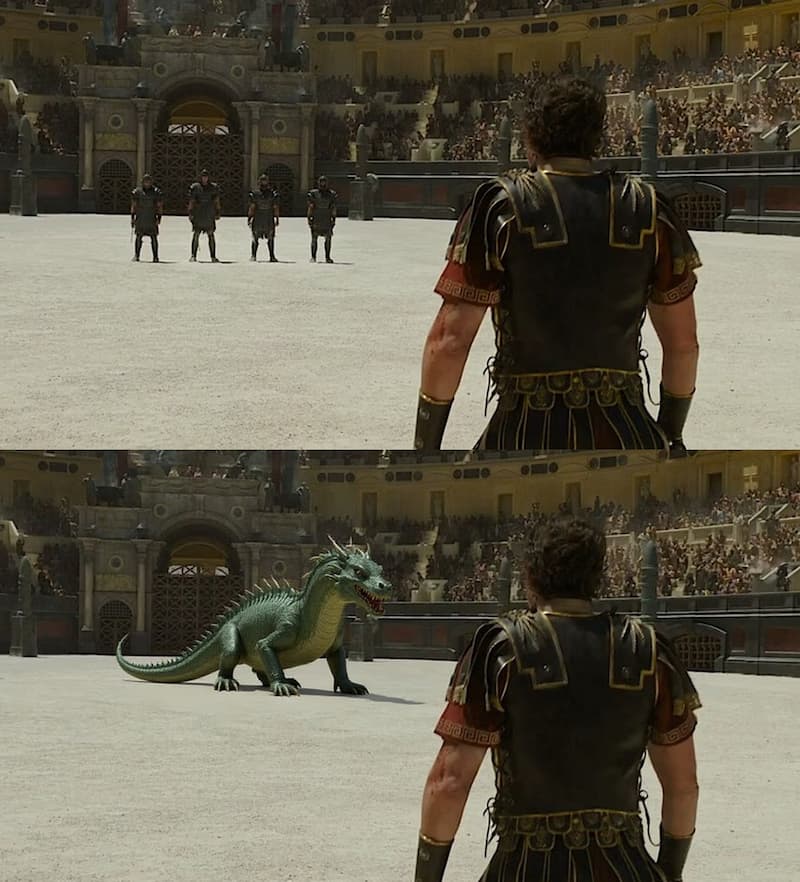
9. Generating Impossible Compositions
The Principle: The AI uses a base image for the scene's lighting, shadows, and perspective, and then attempts to render a completely new object within that established environment.
- Our Field Notes (Experience): If a new object looks "pasted on," it's usually a lighting mismatch. The key is to match the prompt's lighting cues to the source photo's environment for a seamless blend.
Execution Guide:
- Source Image: A scene, e.g., an empty street or the Gladiator scene.
- Sample Prompt:
Change the 4 people in the distance to a giant green dragon
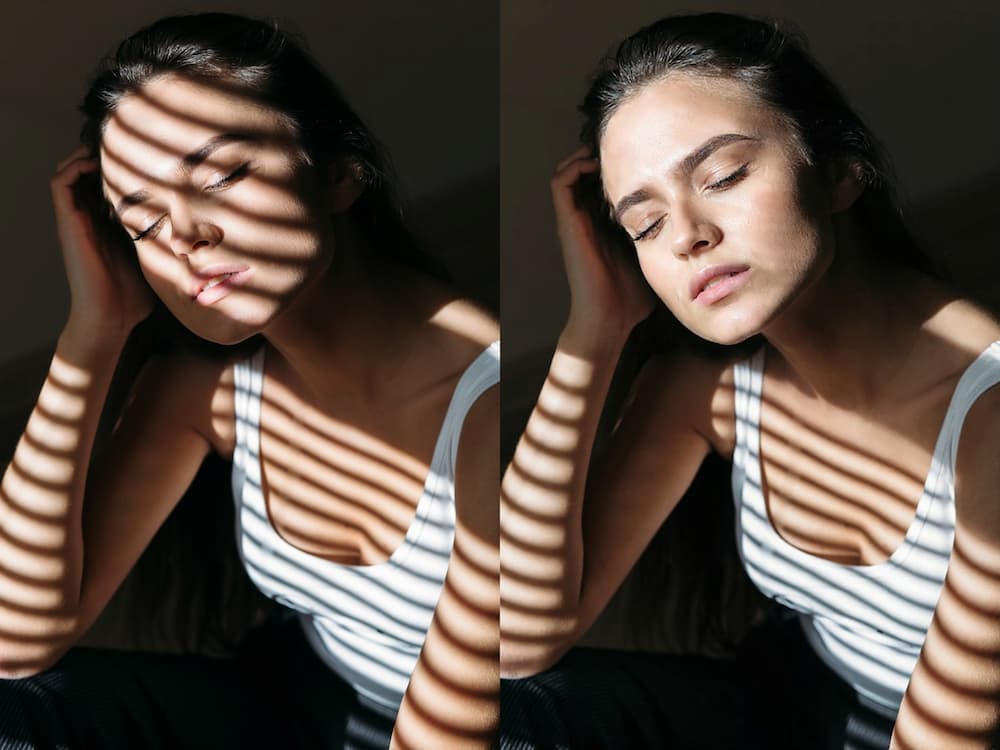
10. Light and Bright: Removing Harsh Shadows
The Principle: Our AI Shadow Remover identifies and neutralizes harsh shadows, realistically filling in the details and colors that were previously obscured by them.
- Our Field Notes (Experience): This is perfect for portraits taken in direct sunlight or product shots where you need to cleanly remove shadow from a photo. In my experience, it handles single, hard shadows wonderfully. More complex, dappled light can sometimes require a second pass.
Execution Guide:
- Source Image: A photo with harsh, unwanted shadows.
- Sample Prompt:
Remove the shadows from the woman's face.
Our Commitment to Trust & Transparency
As creators, we know these questions are important. We believe in being upfront about how our tools work and how your data is handled.
- Your Data Privacy is Our Priority: Your uploaded images are encrypted and used solely to fulfill your request. They are never used to train our models and are automatically deleted from our servers after 24 hours.
- Clear Commercial Ownership: On our premium plans, you receive a full commercial license and own the rights to the images you generate. You are free to use them in any project, personal or professional.
- A Safe and Creative Environment: Our service has robust filters in place to prevent the generation of harmful or unsafe content, ensuring a secure environment for all users.
Frequently Asked Questions (FAQ)
- Q: What's the real difference between Image-to-Image and Text-to-Image?
- A: Text-to-Image creates from a blank canvas based only on your words. Image-to-Image gives you far more control by using your uploaded image as a direct reference for composition, color, and form.
- Q: Can I really use these images for my business?
- A: Yes. All images created under our Pro plans come with a full commercial license, as detailed in our terms of service.
- Q: What’s the best way to write a prompt?
- A: Be specific and descriptive. Instead of "a car," write "a vintage 1960s muscle car, candy apple red, chrome details, cinematic shot." Mentioning the style, subject, and medium gives the AI the best direction.
Your Journey as a Creator
These ten examples are just starting points. True mastery comes from the iterative loop I use every day: generate, analyze the result, tweak the prompt, and go again. Think of yourself as a director, giving our Image GPT generator progressively better notes until its performance matches your vision.
Now it's your turn. Take these principles, fire up image2image.ai, and begin your own experiments.
We are passionate about this technology and would be thrilled to see your work. Share your creations on social media with the hashtag #image2imageAI!
About the Author
Antoli Felipe is the Lead AI Artist at image2image.ai. With a background in both traditional graphic design and computational art, he specializes in bridging the gap between human creativity and machine intelligence. Antoli has personally tested and documented thousands of diffusion model interactions, and his work focuses on developing intuitive, trustworthy workflows for artists and designers entering the world of generative AI.